
Dev Log #2: Style Over Substance
Going against pretty much all of the advice I could find online, I started off with a focus on the aesthetic style before any actual gameplay. I figured if the game doesn’t feel great I can just use the same assets and style for something else. I also thought it would feel nice testing things with more than just grey blocks everywhere, and I needed to improve all my art skills anyway, so at the very least it was good training.
I wanted to focus on a PS1 style look - low poly and low resolution - since that seemed like something I could handle on my own and do relatively quickly, at least compared to anything more realistic.
On top of just modelling low poly and using low resolution texture, there were a few other effects I wanted in game, which got me into some shader work. The 2 main effects I wanted to focus on were the classic vertex wobble caused by, I assume, vertex locations being calculated with low precision, and a general resolution and color post processing to lower fidelity as needed.
So in this dev log I’ll go through a few of the shaders I’ve been working on. I learned most of my shader knowledge from a few different tutorials and this is as much to make sure I actually understand what I did as it is to show off what I’ve been working on.
Making a Simple PS1-style Vertex Wobble
Material Parameter Collection: These are places you can store simple scalar and vector parameters that can be referenced in multiple different materials. This allows you to update a value once and affect all materials using it instead of needing to update everything individually. They could be used to store things like the player position, in case you have multiple materials that are affected by where the player is standing, something like wind speed, or in my case the distance of the vertex snap effect.
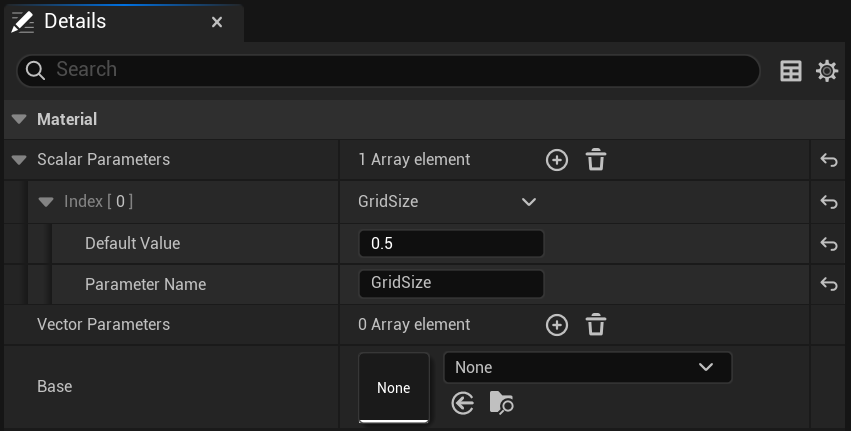
In this example the distance between each of my 3D grid points is set to 0.5 cm, meaning whenever a vertex is not at a location divisible by 0.5 cm it will snap to the nearest 0.5 cm point
Material Function: These are simply functions that could have been made in any material, but put into a nice reusable chunk you can add to any material easily. I am using this to contain my entire vertex snapping functionality so that I can add it to any material I want. It also takes in the GridSize parameter from the material parameter collection so I can control the snapping distance for all materials using this function, keeping it consistent.
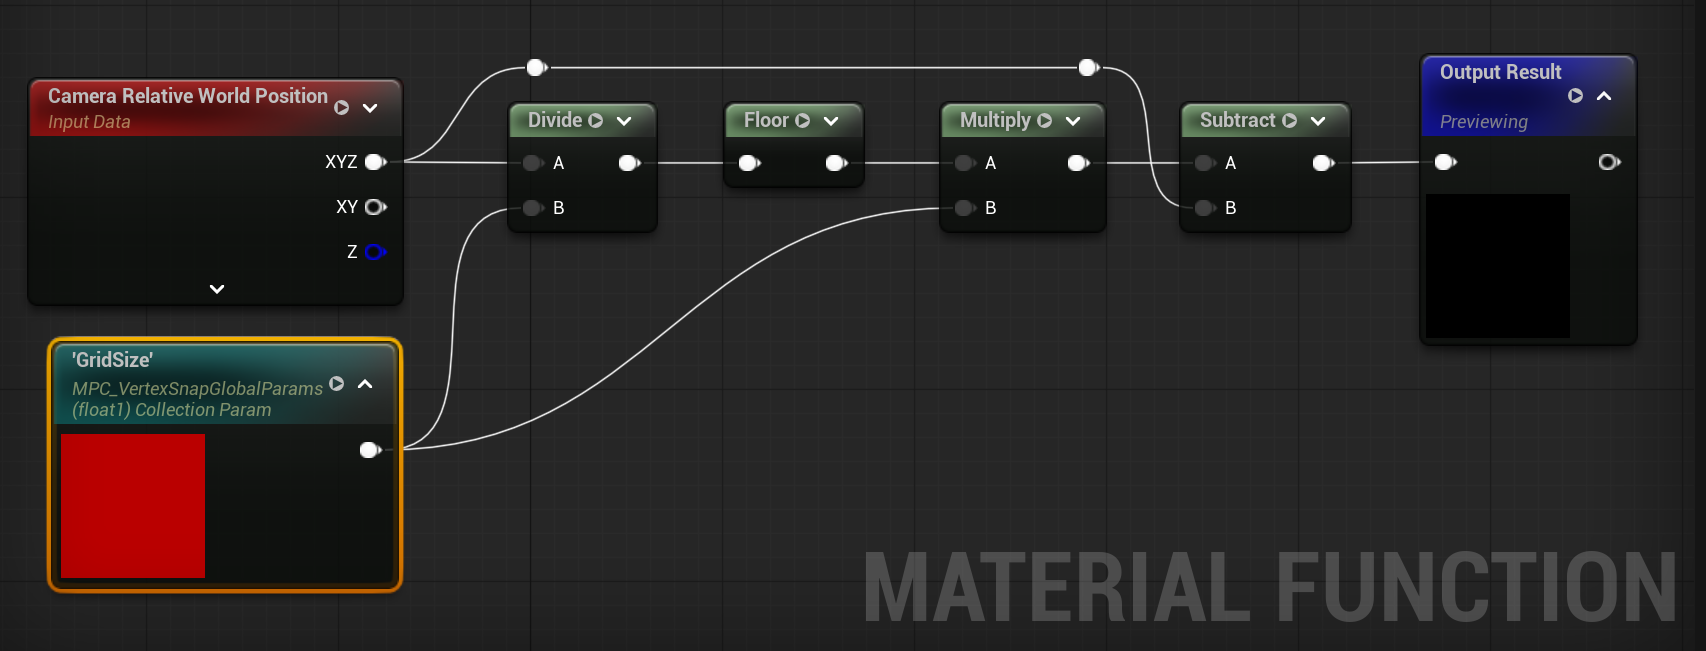
The function itself works by taking the camera relative world position dividing by the grid size, rounding it off and multiplying it back by the same grid size value. This gives the same position but rounded to the nearest multiple of the GridSize. Then you subtract the original position giving you an offset value that can be plugged into the world position offset input of any material. You can get some majorly different effects by playing with GridSize, I’m sure I’ll be toying with it for a while.
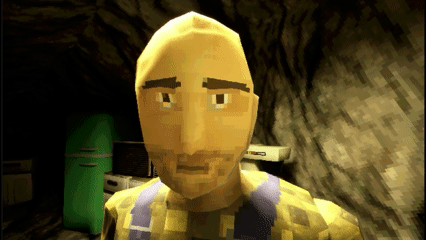
0.5 cm snap distance
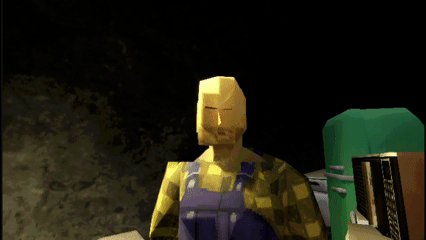
5 cm snap distance
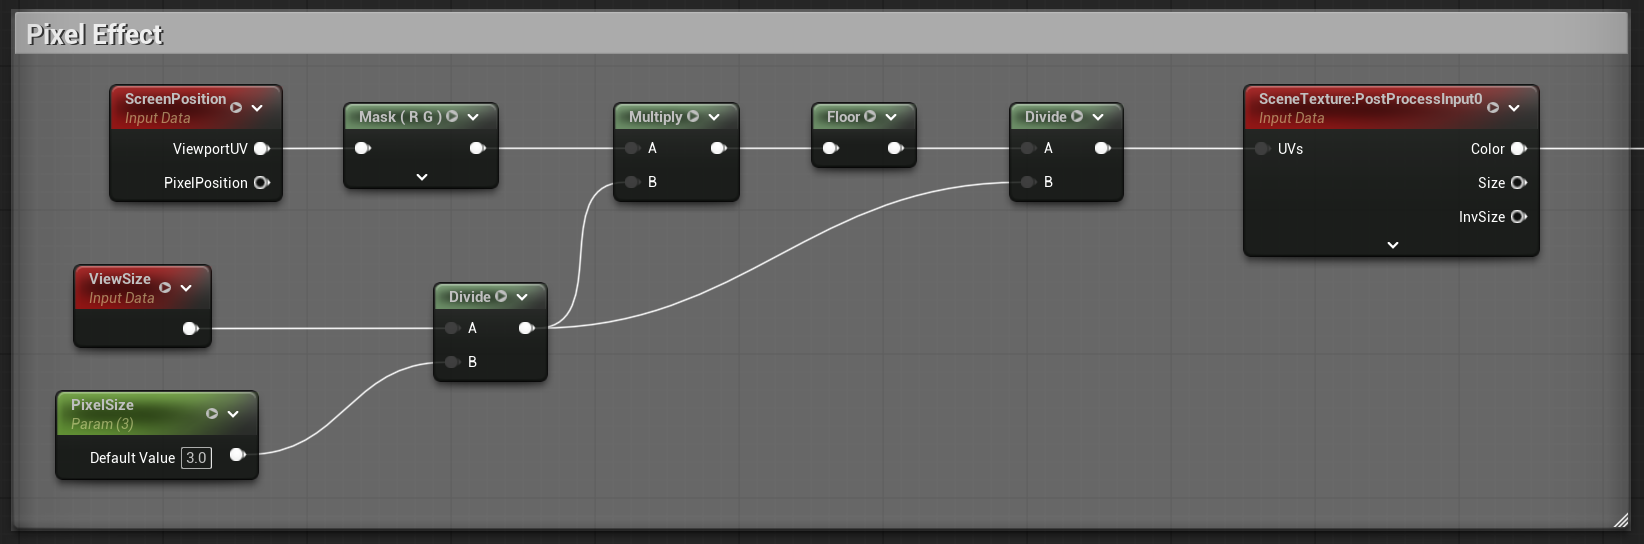
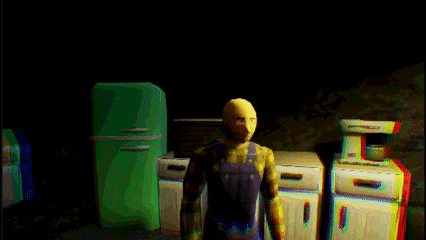
A pixelizing post processing effect
Pixelation Effect: The pixelation effect setup is very similar to the vertex wobble. Take the size of the screen (ViewSize) and divide by our desired pixel size. This will give us a smaller resolution as the pixel size goes up. We then multiply this by the screen position of the current pixel, round it off and divide it to get it back to its approximate starting position (rounded by our pixel size). Plugging that value into the UVs of a post processing scene texture will ensure the color will be output in our pixelated chunks.
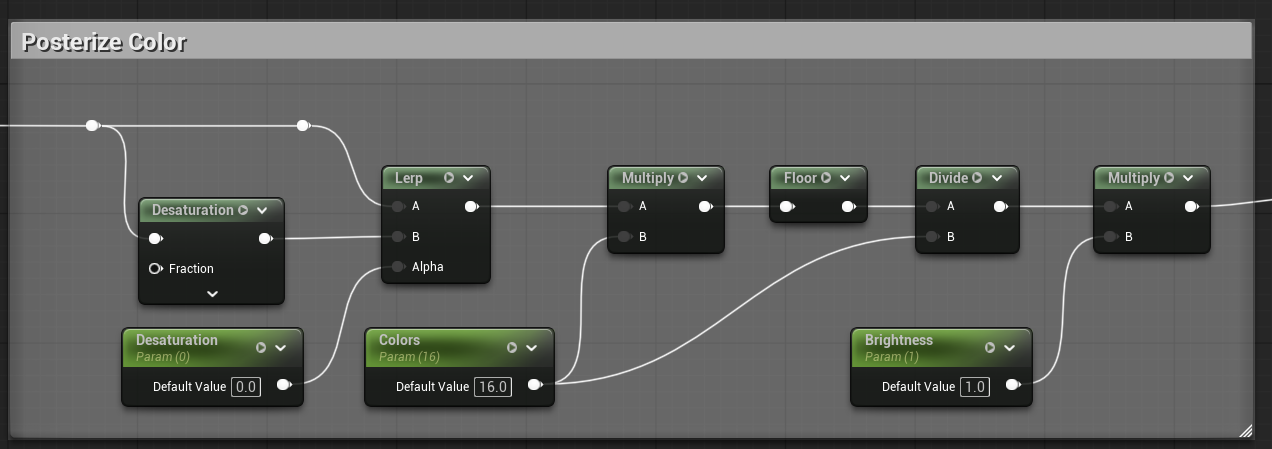
Color Posterization: Posterizing is the act of reducing the amount of colors to a much more limited amount. This is accomplished by multiplying the scene texture color by a value representing the color bit depth, rounding it off and then dividing it back down. The PS1 technically supported 24 bit color depth, but in practice most games used 15 for performance reasons.
Along with posterization, there is a simple desaturation and brightness that we can control by lerping between the full color and desaturated image and multiplying the final result by the brightness value.
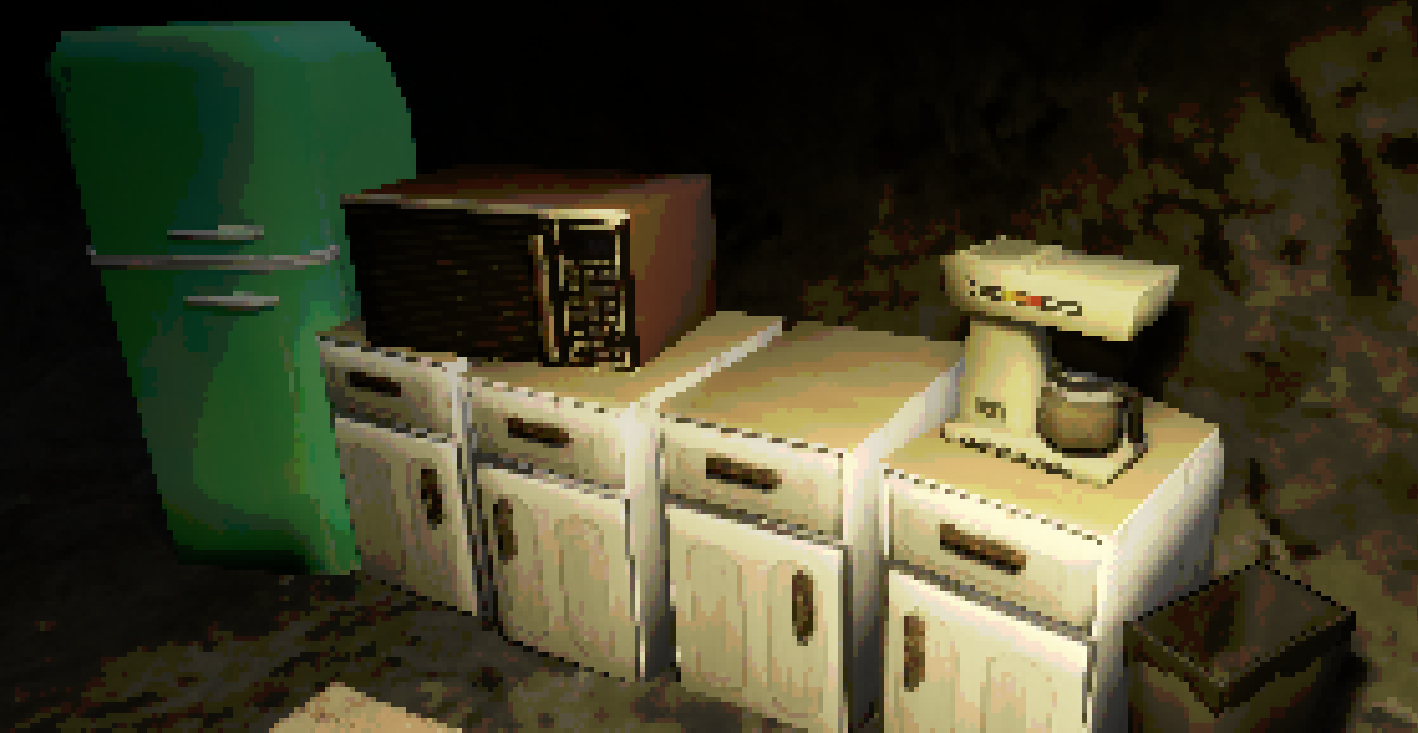
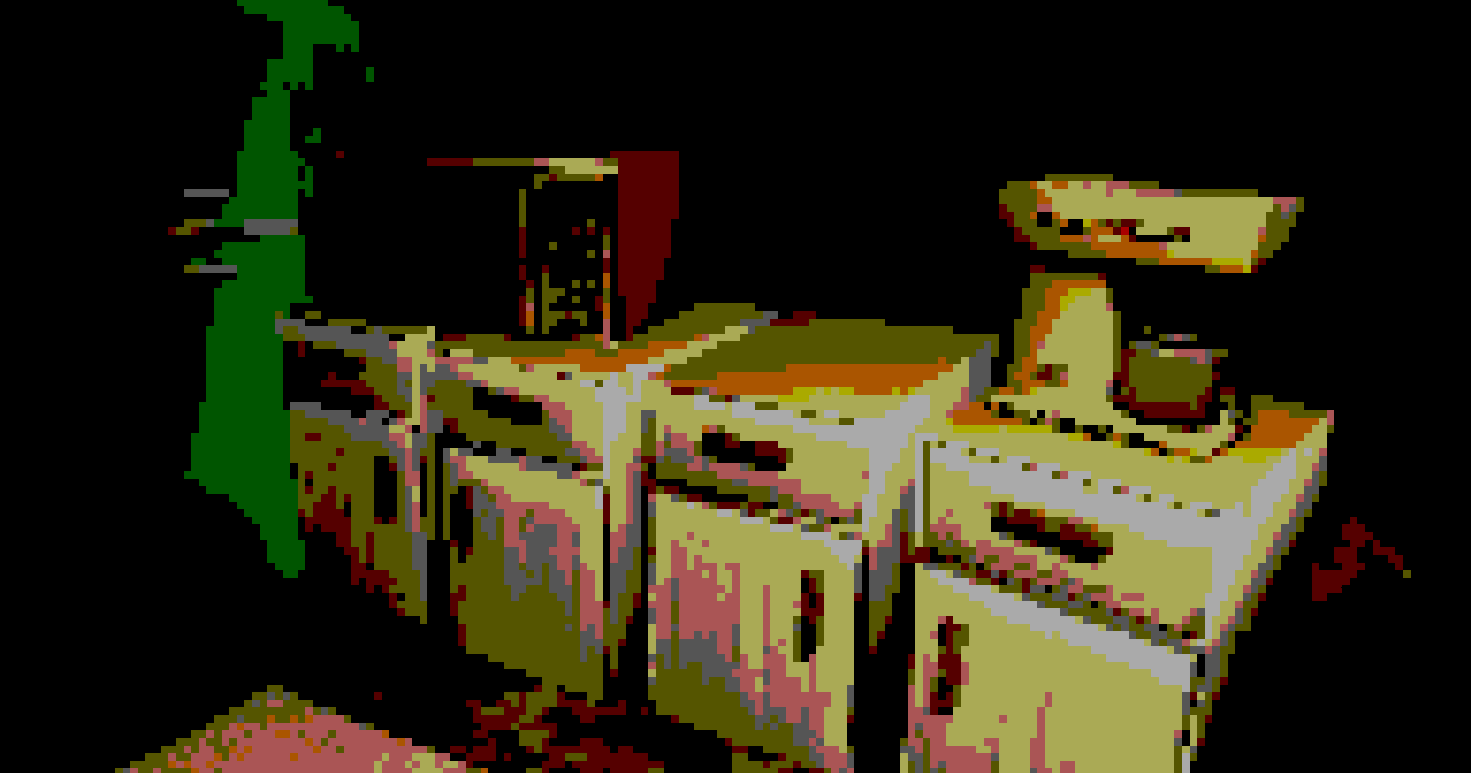
Tweaking the pixel size and colors you can get some big differences
Kaleidoscope Effect
As I was doing the PS1 style shader effects I just wanted to keep working on cool effects and though a kaleidoscope might be a good sort of screensaver if you idle for a while. It just sounded cool in my head so I wanted to make it and learn some more on the way.
The first step is converting the UV coordinates into polar coordinates, which are instead measured by indicating a distance to an origin point and an angle around that point - very useful for trying to do radial effects around a point like a kaleidoscope would be. This also involves moving the origin point to the center of the screen by subtracting 0.5 from both U and V. Just in case I made this a variable if I ever want the effect to not be in the middle of the screen

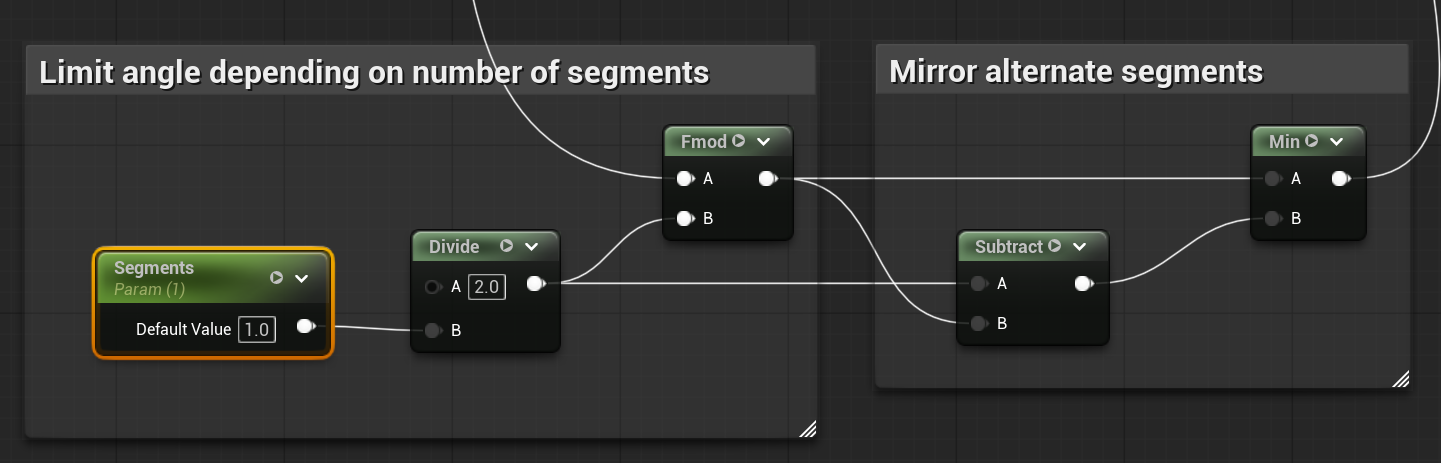
The next step is splitting the screen into different segments. The angle we get for ‘Vector Converted to Angle’ is between 0 and 1, so we do a modulo operator using 2/# of segments we want, which initially gives us half the amount of segments we want. We then subtract that value from the 2/# of segments value and take this minimum. This is what flips half of that segment around, giving us the amount we want and a more accurate kaleidoscope effect.
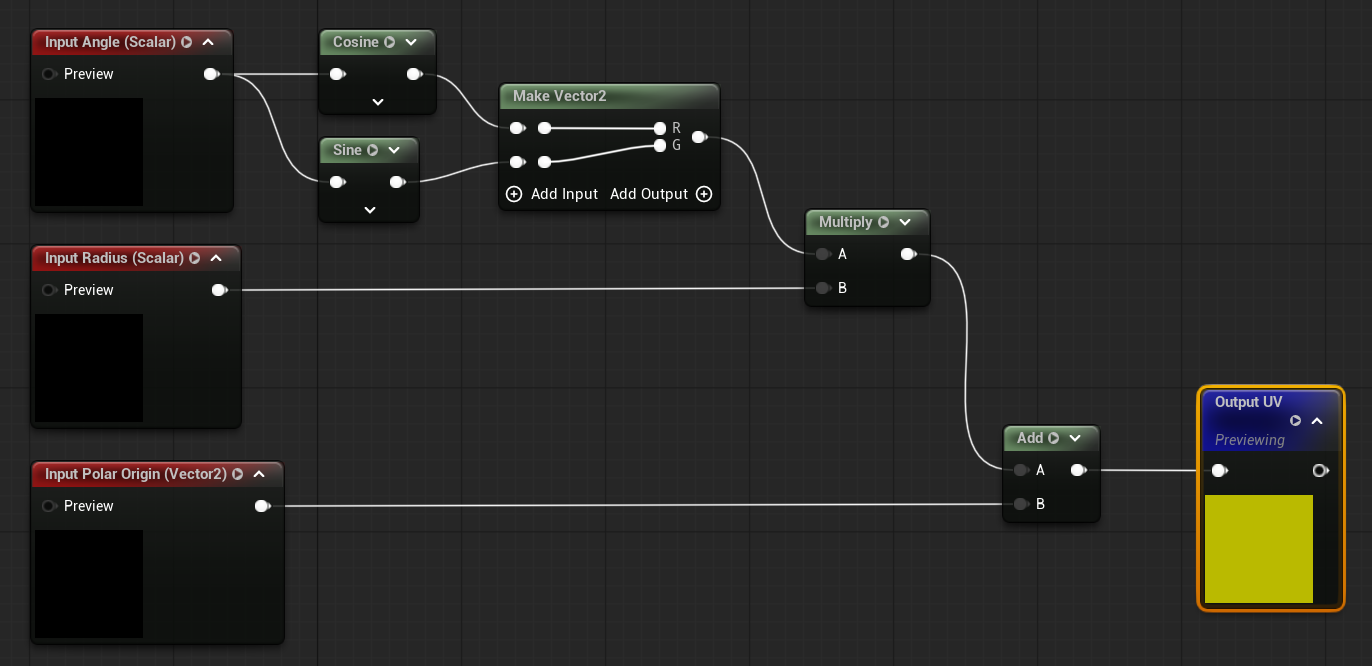
Then we need to turn the updated coordinates back to UV space. For this I made a material function since that didn’t seem to be a built in function already. The function takes the angle, makes a vector by using cosine of the angle for U and sine of the angle for V, multiplying by the radius value and then shifting the origin back to the upper left using the same polar origin value.
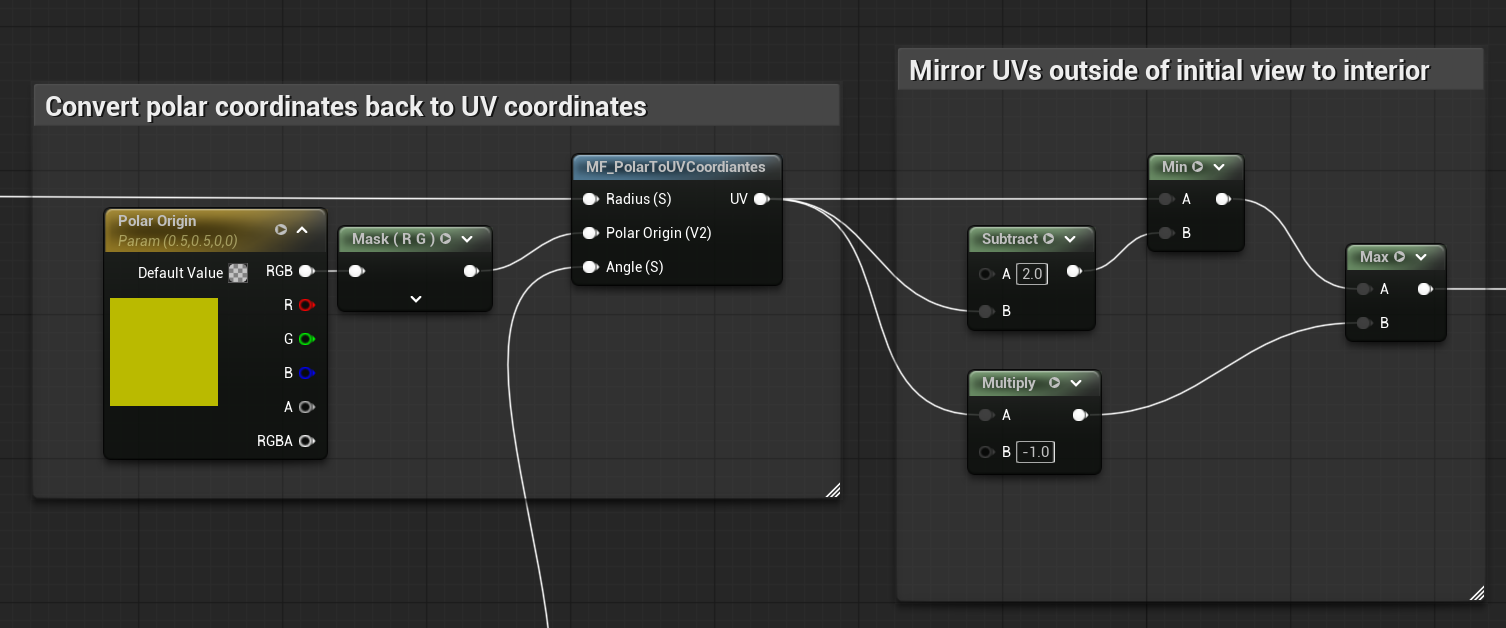
Finally, some UVs may be outside of the coordinates of the initial sliver, so to account for that those UVs are reflected from the inner portions. This is then plugged into the scene texture UV coordinates. The kaleidoscope works best when the segment is an even value, but I like effect of increasing the segments smoothly.
Next month I plan to showcase some gameplay features. Hopefully I’ll be settled more on how I want things to feel instead of jumping around between different ideas. I also managed to finally get through Expedition 33, so hopefully I won’t get as distracted. Until then

Bonus: Parody Philosophy books I put together this week